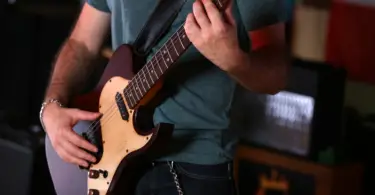
Restringing a guitar is not that difficult process, but we’ve seen some bad techniques in guitar restringing from skilled players in the past.
Guitarists who restring their guitars properly are frequently dependent on costly and unneeded equipment. Even though you like to utilize tools, you may find yourself in a situation where you cannot use them.
Try this easy approach if you want to avoid using tools and restring your guitar like a pro.
Quick Links
Should you restring one at a time or restring your guitar all at once?
It all varies; changing one string simultaneously keeps the tension from shifting dramatically over the entire instrument.
It is great for reducing the time it takes for tension to equalize. It’s also your sole choice if you simply need to repair a single damaged string; removing all strings at once provides the ideal chance to clean your guitar’s fretboard.
Changing tools
Although some tools on the market are only for altering strings, some are multi-tools that could do much more. Nevertheless, the only equipment theoretically needed to rest a guitar is a wire cutter to trim extra string after the tuning post.
Remember that guitars frequently have different components that impact the setup or playability. Therefore, you should consider what tools you’ll need to modify, like the hex key/Allen tool frequently provided with guitars.
Detuning your guitar and removing old strings
Begin by uninstalling the existing strings before you continue replacing them. It is accomplished by detuning each string until it is entirely loose and then cutting it in half. It is not necessary to cut the strings, although it helps make removal easier. Old strings are rarely reused. However, they can be used or recycled.
- Detune the string until it no longer has tension and generates no pitch.
- Cut the string in two with wire cutters, generally where the neck joins the body.
- Remove old strings from the bridge entry and tuning posts.
- Repeat this process for each string.
Make sure the fretboard is clean
When you remove all of the strings at once, you have the finest opportunity to clean your guitar’s fretboard and frets. To clear any built-up debris, use a soft cloth and the specified cleanser. Unpolished fretboards like rosewood and ebony necessitate using a suitable oil-based wood conditioner, whereas polished fingerboards just require a basic polish.
Install your new strings
Now let us put the new strings on now that the old ones have been removed. When adding fresh strings, the essential thing to keep in mind is not to over-tighten them. So it is since the strings must stretch and adapt to the new tension. Just be aware that if the strings are tuned too high (above normal tuning), they may shatter under stress.
To avoid damaging fresh strings, replace them one at a time, keeping track of whether you’re changing and which tuning key controls it.
Identifying each string
- Take the strings out of their package. Identify every string by its packing label or the shade of its ball ends.
- Unwind the string and put it through the relevant bridge entry. Pull it carefully all the way through, allowing your fingers to keep it from jamming against the bridge hole.
- Fit the string well over the bridge saddle as well as the nut slot.
- Continue crimping and trimming the non-ball end.
Crimping and trimming the non-ball end
- Move the string to the middle of its matching tuning post, leaving no gap before the bridge.
- Bring the string to the tuning post, whether through or into the tuning post, based on the tuner style:
- As stated in the post: Trim a further 1–2 inches of string from the tuning post using the wire cutters.
- In the middle of the post (headstock): Determine 1–2 inches beyond where the string passes the tuning post and then bend, a.k.a. crimp the string at 90 degrees. Next, trim a further ½ to an inch of string well beyond crimp with the wire cutters.
- Keep going. Tighten the thread and wrap it around the tuning post.
Tighten the thread and wrap it around the tuning post
- Eliminate any twists which may have formed during the string installation.
- Turn the tuning key to tighten the string, making sure it loops downward along with the post. Continue spinning the key, and when the ball end reaches the bridge/tailpiece, position the string such that it is uncoiled and secured against the proper bridge saddles and nut slot.
- Turn the key till the ball end is snug against the bridge.
- Trim any extra string after tuning the string to pitch.
Stretch and tune
After being restrung, you’ll observe that strings will continue to fall out of tune until after they’ve “settled” or “broken in.” It is because they must adjust to the new stress. Stretching the strings is such a technique to shorten the time required for them to adjust. First, stretch the string throughout its whole length to acclimatize it faster and to stabilize the pitch. Then, repeat because of tuning and stretching.
- Bring the string up to pitch with a tuner.
- Stretch the string lightly throughout its length.
- Repeat the tuning and stretching procedure until the pitch of each string has stabilized.
- You have completely replaced the strings on your guitar!
When Should You Change Your Electric Guitar Strings?
The frequency with which guitar strings should be replaced is subjective; nevertheless, it depends greatly on the sound you wish to generate and how frequently you played that guitar. Consider washing them off with a fretboard-safe string cleanser if you just want to extend the time between restringing your strings.
Cleaning dirty strings
The most typical point of changing strings is that they have grown dirty, have ended up losing their tone, and no longer remain in tune. Sweat, oil, and dead skin cells will be transferred to the instrument when your fingertips, palms, and arm make contact with it.
All of that muck gets stuck between the strings field winding, changing the feel and sound. If it is not wiped away after playing, it will accumulate, reducing sustain and eventually dulling the quality sound.
Change the gauges or sizes of your guitar strings
Apart from normal wear and tear, you may need to replace the strings to suit your way of playing. Because each piece of string differs in tension, tone, and feeling, there are several details to contemplate when picking a new set.
Changing the gauge the string diameter will change the tension, but it will also necessitate a setup to suit the new string size. Changing the materials stainless steel, nickel, nylon changes the frequency content (bright vs. warm) and the sustain. Not sure which to choose? Simply select a set with characteristics that are suitable for your preferred genre or particular playing style.
Setting up your guitar after restringing
Letting the electric guitar set up will make it adapt to changes. Unfortunately, that means that if you replace the strings, you typically have to modify the instrument. The string tension is determined by the diameter (gauge), which influences the tension rod (neck bow), action (string height), and pitch (string length).
When you’re restringing with similar pieces of strings, you shouldn’t have to make many adjustments; nevertheless, it never costs to double-check.
Conclusion
Having read all the simplest ways to restring your electric guitar, you may know to feel like a pro and ready to restring your guitar right at this moment when restringing; remember to only buy the right strings and put them in the right place for better sound and playing experience.


